
A pattern for you.
In commemoration of my trip to Purl Soho last May, where I got the yarn to make this triangular scarf I am calling this pattern Soho Scarf.


The scarf is made from MadelineTosh Merino Light which we have a pretty collection of in the store. This is a a beauuuuuutiful yarn to work with. So soft! It is a one ply which makes it quite a unique fingering weight yarn, very delicate and subtle and so perfect for shawls and scarves.

SOHO SCARF

All the materials for the Soho Scarf are available in a Knit Café Knit Kit with yarn and printed pattern HERE
Materials: 2 colours Madelinetosh Merino Light 420 yds, 384 m each
pictured in Clover (main colour) and Sequoia (contrast colour). I had much left over of Sequoia, probably enough to make another scarf with it as the contrast colour again.
3.5mm circular needle 80cm
2 stitch markers
Gauge: 25 sts/ 10 cm (4 inches) in stocking stitch
Finished Dimensions: 122cm (48 inches) long, and 58cm (23 inches) deep
Pattern Notes: This scarf is made beginning at the neck edge and working towards the border. 4 increases every other row makes the triangular shape, two surrounding the mid point and one on each selvedge edge. There is a garter stitch border of 2 stitches along the selvedge and a wide garter stitch finale border.
Abbreviations: pm=place marker, Sl1=slip one, M1L=make one left, M1R= make one right, sm=slip marker, wyib=with yarn in back.
With contrast colour CO 5 sts
Row 1: Sl1, K1, pm, P1, pm, K2 (markers are added on this row around the mid stitch)
Row 2: Sl1, K1, M1L, sm, K1, sm, M1R, K2
Row 3: Sl1, K1, P3 (slipping markers), K2
Row 4: Sl1, K1, M1L, K to m, M1R, sm, K1, sm, M1L, K to last 2 M1R, K2
Row 5: Sl1, K1, P to last 2 sts (slipping markers) K2
repeat these rows once more (15sts) and change to main colour.
Repeat rows 4 and 5 with main colour
Repeat rows 4 and 5 with contrast colour
continue in this manner changing colours every 2 rows till scarf measures 48cm (19 inches) or desired length from CO, ending with main colour row.
Border is in garter stitch
Row 1: Sl1, K1, M1L, K to m, M1R, sm, Sl1 wyib, sm, M1L, K to last 2 sts, M1R, K2
Row 2: Sl1, K to m, sm, P1, sm, K to end
Repeat these 2 rows till border is 8cm (3.25 inches) or desired length.
BO loosely (use a crochet bind off or a larger needle)
.
Pattern Tutorials
Slipping Stitches
This scarf pattern has a narrow garter stitch border with a slip stitch edge. This is how I slipped my stitches to create a nice and neat flat edge of interconnecting V’s.
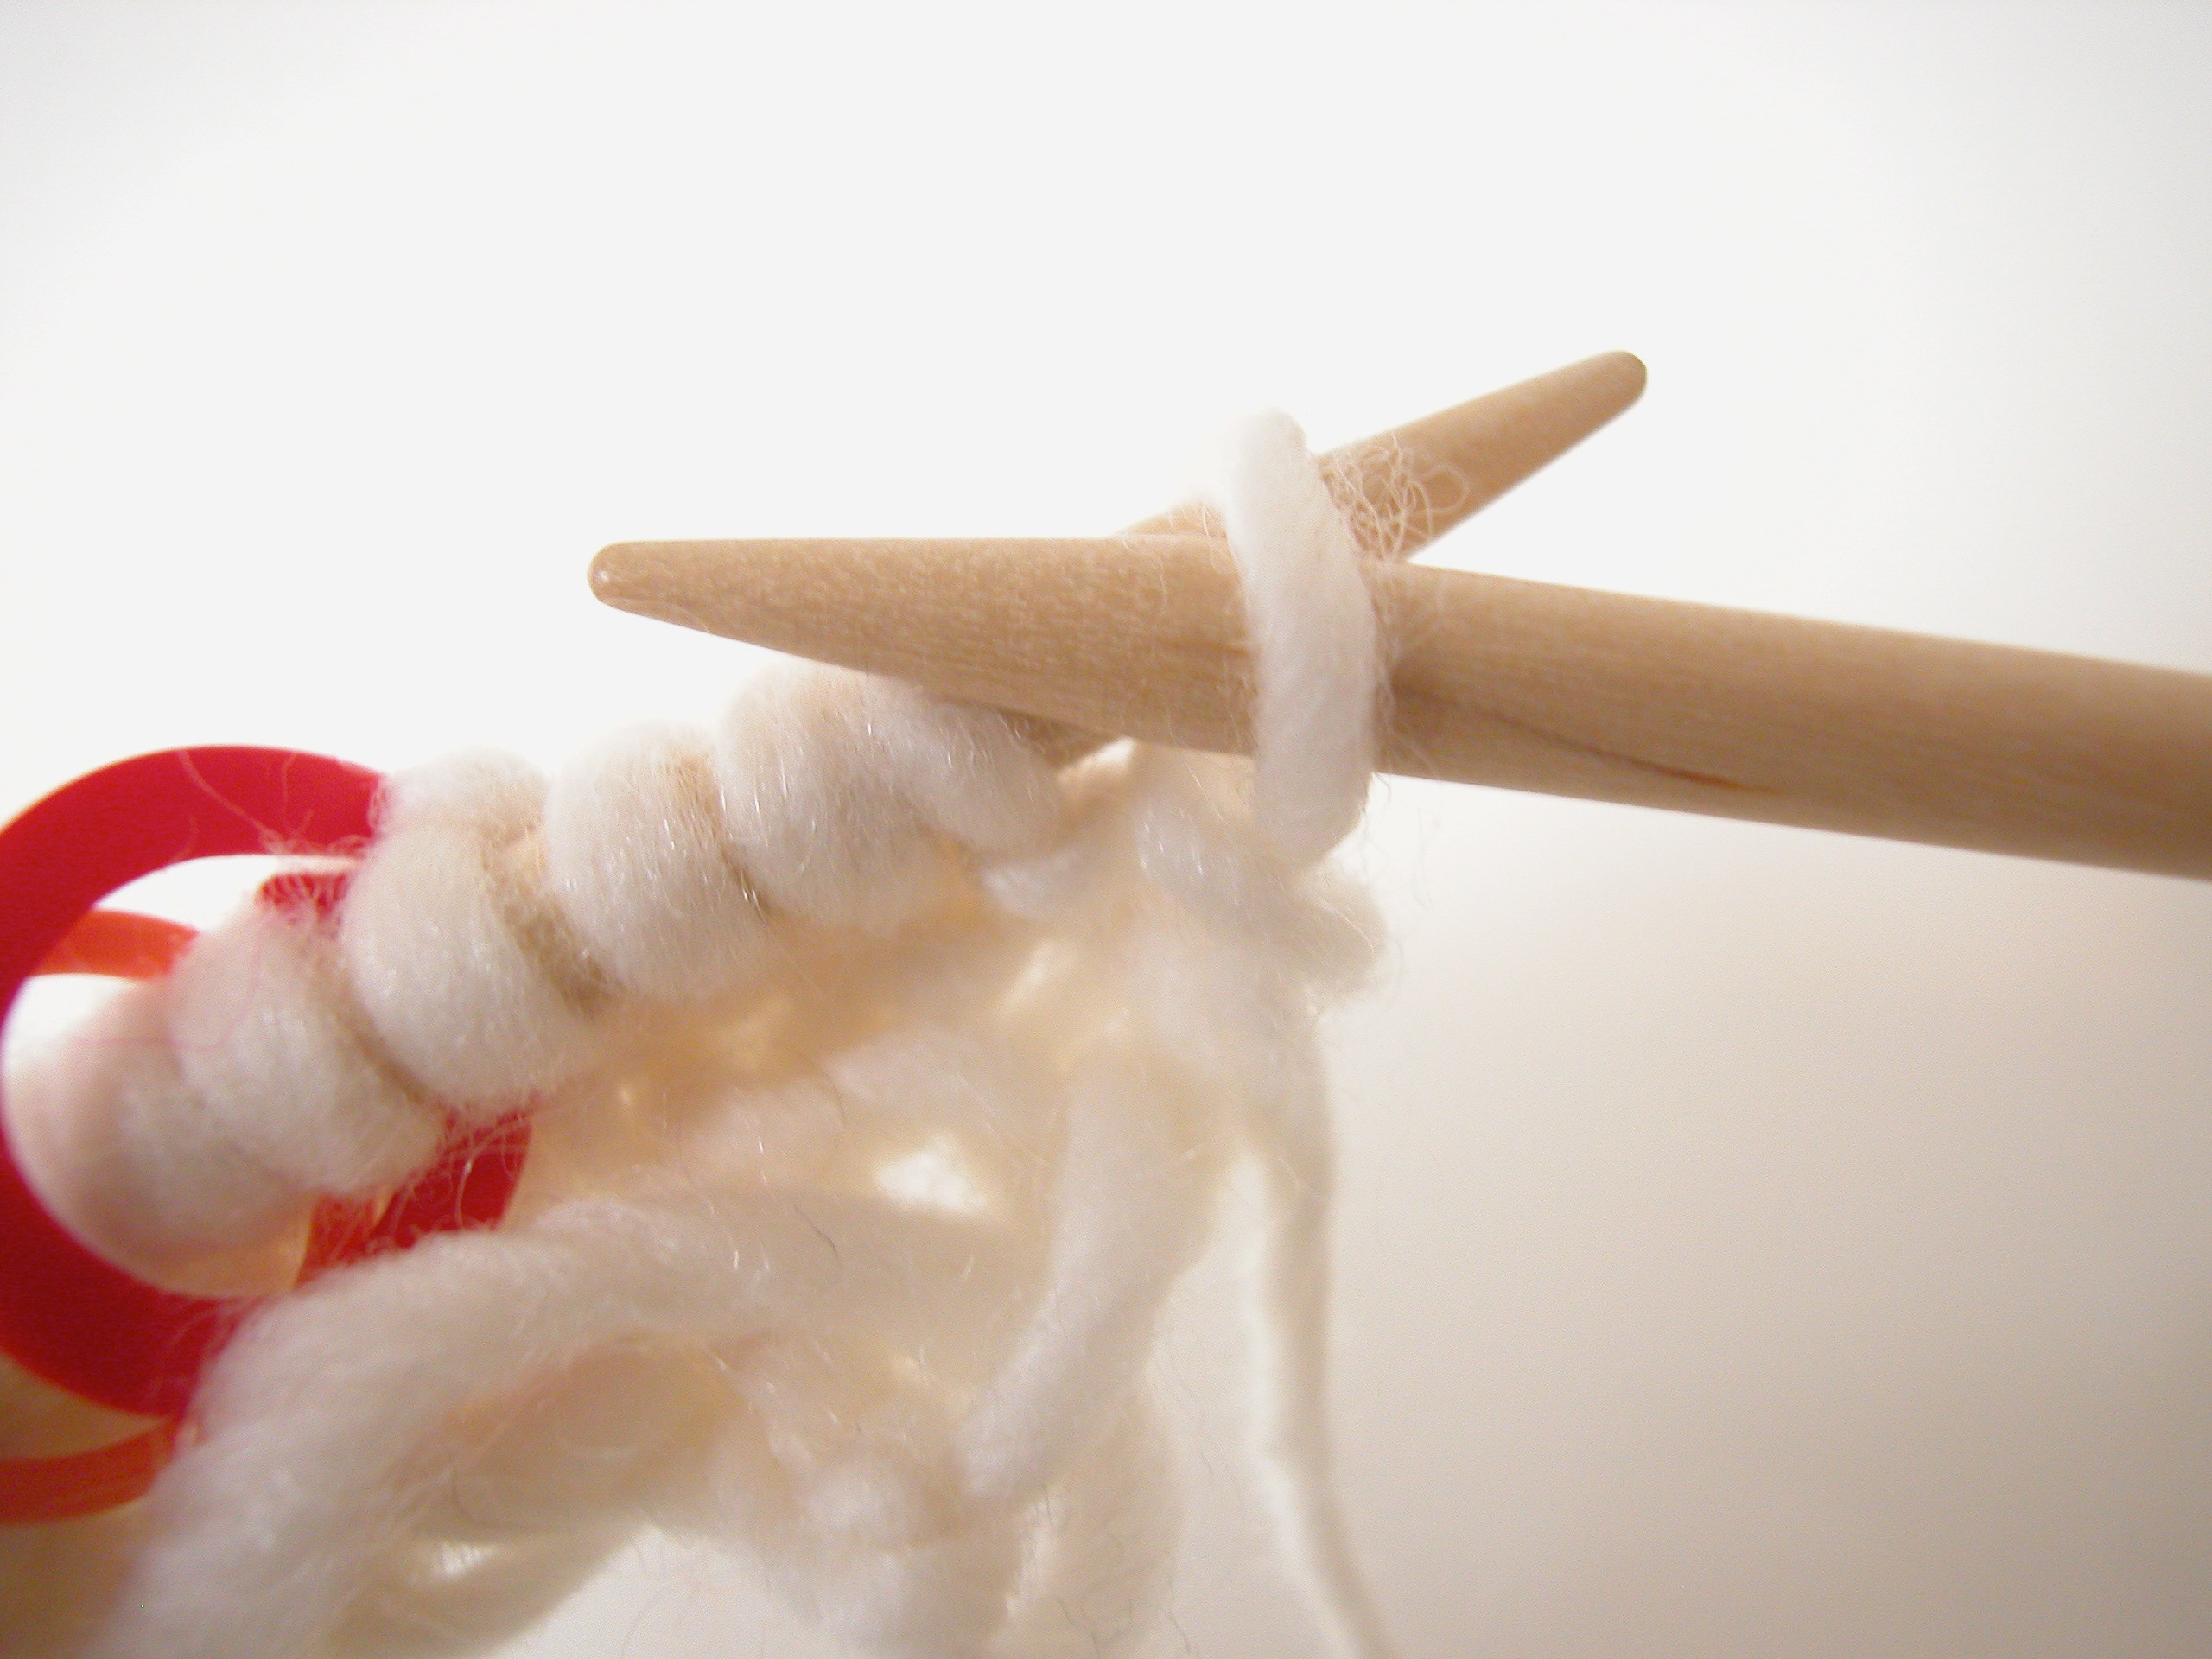 Insert your needle into the stitch like you would if you were purling it (from right to left)
 Slip that first stitch off your left needle so it sits on the right.

Before you move on… bring the working yarn in between the two needles from the front to the back position (like you would if you were changing from a purl stitch to a knit). Now continue… you’ve slipped your stitch!
M1L
means make one left and here is how you do it.
 Pick up the yarn that runs in between the two stitches
 Put it on your left needle. The leg of the yarn in front of the needle should be a step ahead of the one hanging behind the needle.
 Knit this new stitch through the back loop. Knitting through the back loop tightens up the stitch and prevents a hole. This will certainly feel stiff!
M1R
stands for make one right and this is how you do it. Pick up the yarn in between the two stitches (see figure 1 for M1L) and put it on the left needle. In this case the leg of the yarn in front of the needle should be bringing up the rear and the leg hanging behind the needle should be a step ahead.
 Knit this new stitch through the front of the stitch like a regular ol’ knit.
This will also feel tight and awkward – this is how it should be!
Colour Changes
 When you first add your Main Colour Yarn you will want to maintain your slip stitch edge. This can be a bit confusing but it is easy!
Just slip your first stitch as always and reposition your working yarn in the back (as always). Then knit your next stitch with your new colour!
When you already have both colours in play and you want to to switch from one to the other you can do so like this ↓
 Slip the first stitch and put the yarn in the back (like always)
 Twist your yarn colours so they interlock by putting the previous row’s colour under the new colour. WHEN YOU SWITCH FROM ONE COLOUR TO ANOTHER KEEP YOUR TENSION VERY VERY LOOSE. I can not stress this enough. This side of your work has a tendency to tighten up and you end up with a puckered edge, so err on the side of loosey-goosey .

Good luck with your scarves one and all, and have fun too!
Click HERE for and Easy to Print PDF
Craftily yours
Kristin


This looks like a lovely warm scarf. Can it be knit on 2 needles rather than a circular needle? Also what does it look like when it is lying flat? It would be good to see the whole before I start knitting.
Chris
Hello Chris. You can start your scarf on straight needles but at some point it will become too big to fit on them, as the size increases every row. At that point you can switch them for circulars. It turns out quite a few people have posted their soho scarf projects on Ravelry. You can have a look there and get some more views of the scarf and lots of great combinations of colours too. Here’s the link . Just sign in and click on the project tab at the top of the page to see 38 examples!
Only yesterday I decided NOT to start another project as I am working on three (crochet) blankets, a green mohair cardigan, and a black merino lace scarf (not to mention work, son, home …) – but then I saw your Soho scarf pattern and all those beautiful color combinations on Ravelry … Seriously – how can I possibly WITHSTAND?
Trying out new colour combinations is such an incentive for me to start a new project too!
Don’t mind me asking but I do not understand the pattern. At the end of row 2 you have 7 stitches, there are no increases in row 3 – but all of a sudden in row 4 I am supposed to have 15 stiches. How does this work? Am I reading it wrong? Thanks for your help!
Hello,
There are 4 increases in Row 4 (all Make-Ones – M1L and M1R). They fall by the border on each selvedge edge and one on either side of the midpoint like this:
Row 4: Sl1, K1, M1L, K to m, M1R, sm, K1, sm, M1L, K to last 2 M1R, K2
This row is repeated on all even rows. Therefore after row 4 is completed you have 11 sts (7+4=11)
Row 5 and all odd rows have no increases.
Then the pattern says “repeat these rows once more”. On row 6 you will add another 4 sts as it is an even row and row 7 will have no increases since it is odd. You will have 15 sts now (11+4=15)
Continue with these increases on all even rows and change colour on each even row too.
and have fun!
Thank your for your fast reply. One last question: what does “K to m” stand for?
knit to marker!
Pingback: FREE pattern Wednesday! | Stash-a-Yarn
Great pattern currently working on it. I was just wondering, do you recommend blocking for this pattern or should I leave it as is? It’s my first shawl/scarf so unsure what would be best.
Thanks!
You’ll want to block the shawl after it is done to define the triangular shape and to stretch out the selvedge edges which have a tendency to be tight. It helps to even out the stitches too and makes your knitting look polished.
Maybe I’m being a real newbie here, but which direction do I measure ‘from cast-on’? From cast-on to the spot where I’m working, or to the middle of the row I’m working (ie, straight down the center ridge)? Thanks!
Measure straight down the centre.
I need some help about what is involved in slipping the markers. Will the markers always be placed so they are on either side of the centre stitch i.e. with 15 stitches the markers would be on either side of stitch 8.
That is exactly right.
Clarification on the M1L and M1R usually I see notation to pick up the bar from the front on M1L and from the back on M1R…..you didn’t indicate that and in fact told readers to refer to first photo….does it matter? There is always a variety of opinions on these techniques, so I just wanted to clarify if yours was a “shortcut” Thanks – BEAUTIFUL TUTORIALS!!!! so clear and well labeled!
Hello! Thanks for the question. It doesn’t matter too much how you pick up the bar, it matters how you place it on the left needle. See the diagrams for each, for the positioning of the yarn.
Hello! Thank you for this pattern! I have heard of a technique for striping that uses circular needles, and sliding the work from one end to the other to change yarns. Can you please help me identify what it is called?
Hello, I have never heard that technique called by a specific name but I did find a nice looking tutorial for it HERE
Maybe that will help.
Hello
I just started this pattern tonight. A little confused on row 4
I am at my first marker before I M1 MR. Do I leave my marker on the needle before I make the M1R. Could you show me with a visual of what I’m suppose to do?Thank you
Just a little confused being a somewhat new knitter
Thank you
Hi there.
The sm in the pattern is for slip marker, therefore you knit to your marker make one right before it then slip the marker then knit 1 then slip the next marker and then make one left. You will still have one stitch in between your markers after you finish. Hope this helps.
Pingback: Scarf Knitting Patterns - My Roundup Of The Best - BOT COOKS